Today, I ran a workshop called Video Visualization together with RITMO research assistant Joachim Poutaraud. The workshop was part of the Digital Scholarship Days 2023 organized by the University of Oslo Library, four days packed of hands-on tutorials of various useful things.

Presentation slides made by Jupyter Notebook
Joachim has done a fantastic job updating the Wiki with all the new things he has implemented in the toolbox. However, the Wiki is not the best thing to use in a workshop, it has too much information and would create an information overload for the participants.
I thought about creating a presentation in a “normal” editor, of which LibreOffice Impress and Google Presentations are my two current go-to solutions, depending on whether I need to collaborate with someone. However, that would involve creating a lot of screenshots manually. Then I remembered that Jupyter allows exporting presentation slides directly from a notebook.
We have a Jupyter notebook that used to serve as an overview of the toolbox before the Wiki was appropriately developed. Now I took the time to revamp the notebook, reorganizing some of the content and adding new features. I also removed various things I knew would not work well in a workshop context.
Exporting the presentation
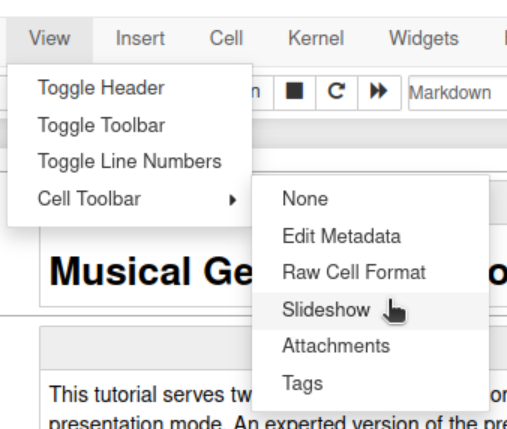
To turn a notebook into a presentation, you need to specify the “slide type” for each cell. You can turn on this setting under View > Cell Toolbar in the menu:

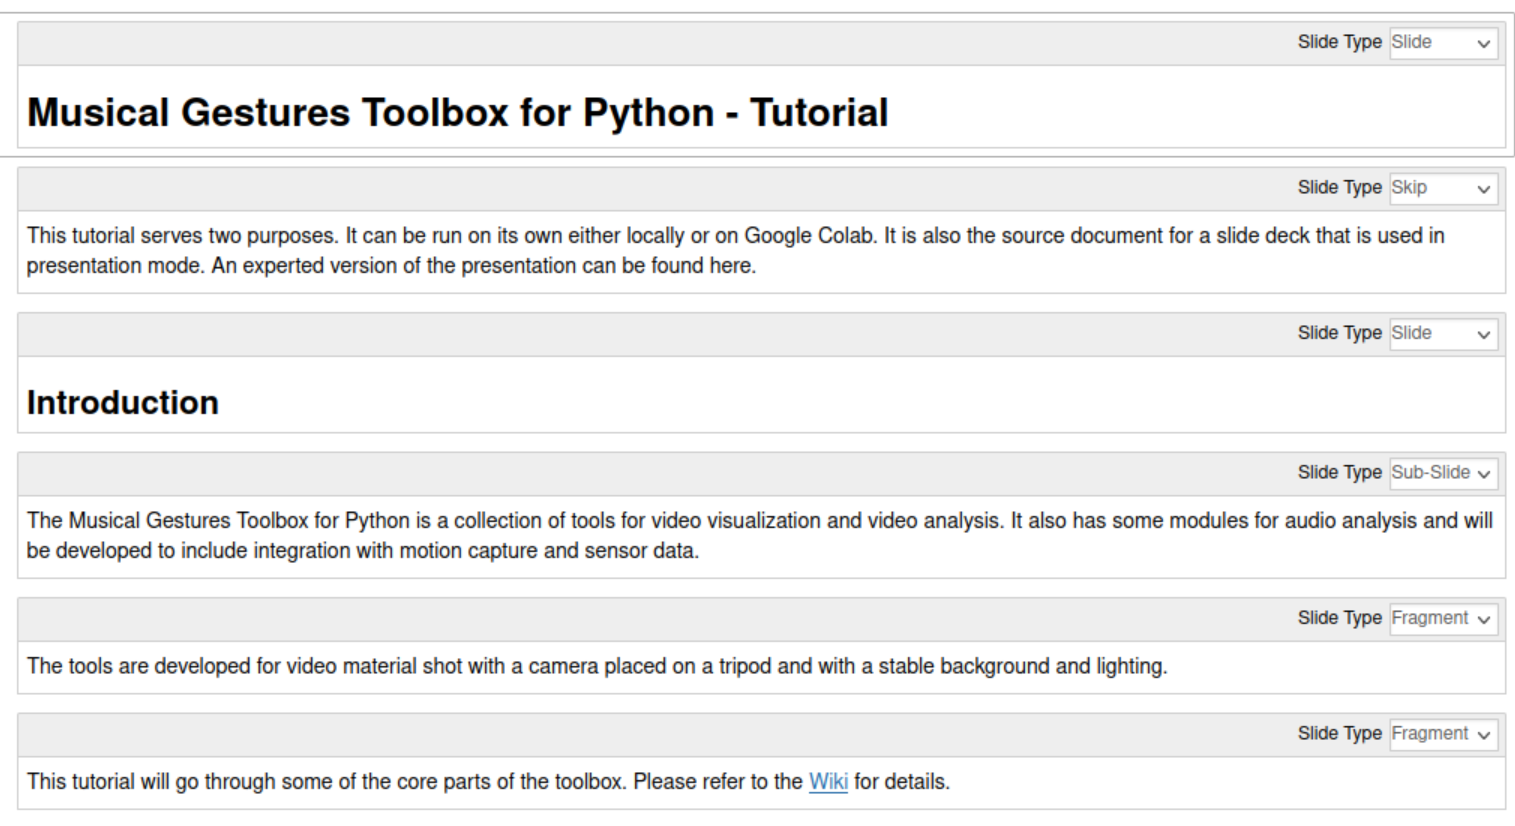
Then you will see a “slide type” drop-down menu on the right side of each cell:

I had to experiment with finding suitable types for my presentation style. Particularly the “fragment” option needs some fine-tuning; this is the setting you would use to have individual lines show up when you click a key or mouse. That also meant I had to break up some of the cells to achieve the desired effect. It took some time when I started with a complete notebook. It would have been easier if I had known that I would create a presentation when starting to make the notebook.
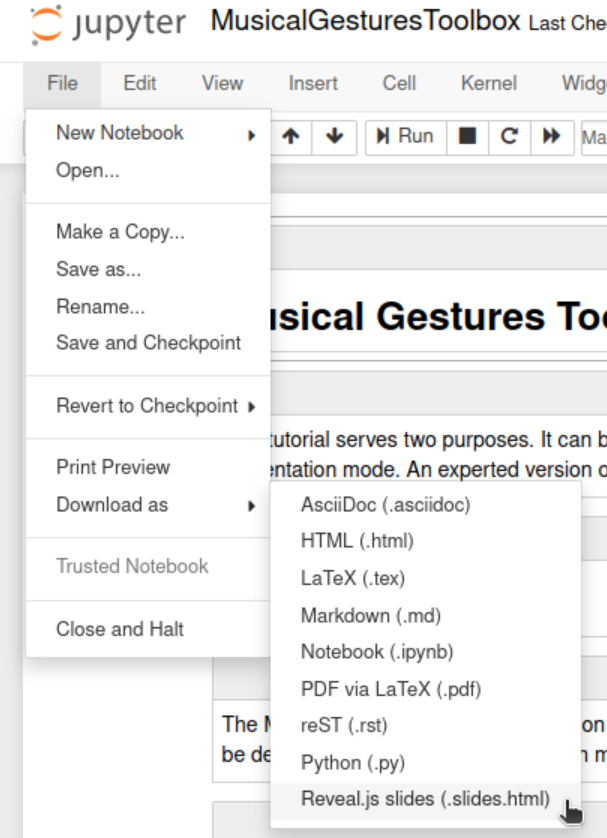
Then you can export the notebook by going to File > Download as in the menu:

This will export an HTML file styled with the reveal.js framework. The notebook can then be shown in a browser (a copy can be seen here). The nice thing is that everything (at least the cells you selected) will be shown in the presentation:

So it saves a lot of time in preparation and ensures that the workshop participants see the same content as in the source notebook.
A 2D presentation mode
One of the nicest things about reveal.js, is its “2D” presentation approach. Looking at the overview of the presentation (which you can get by hitting the Escape button in the presentation) you can see that the slides are laid out in a grid:

This allows for organizing the content in “chapters” from left to right while the content is going from top to bottom. This allows for quickly adjusting the “depth” of the presentation as you go. In a workshop, you may not know how much time you will spend on various things, and thus such a 2D presentation makes it easy to skip to the next session.
All in all, I think this is an excellent way of creating and running presentations. I tested reveal.js for teaching some years ago. For regular presentations it is a bit cumbersome to set up but when dealing with data and code it is a huge time saver.
