In some recent posts I have explored the creation of motiongrams and average images, multi-exposure displays, and image masks. In this blog post I will explore different ways of generating keyframe displays using the very handy command line tool FFmpeg.
As in the previous posts, I will use a contemporary dance video from the AIST Dance Video Database as an example:
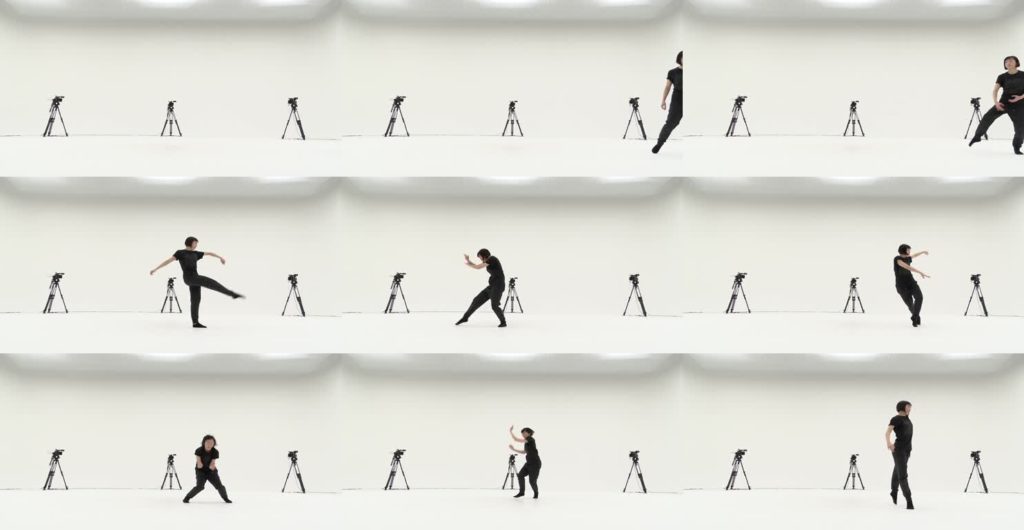
The first attempt is to create a 3x3 grid image by just sampling frames from the original image. I spent some time exploring different ways of doing this. It is possible to do it with a one-liner:
ffmpeg -ss 00:00:05 -i dance.mp4 -frames 1 -vf "select=not(mod(n\,200)),scale=495:256,tile=3x3" tile.jpg
The problem with this approach, and many similar that I found by googling around, is that it samples frames with a specific interval. In the above code it looks up every 200th frame, which gives this image:

The problem is that the image only contains information about the 1600 first frames, or more specifically frames 0, 200, 400, 600, 800, 1000, 1200, 1400, 1600. I want to include frames that represent the whole video.
I see that many people create such displays by sampling based on scene changes in the video. There are two problems with this. First, it requires that there are scene changes in the video. This is usually not the case in the videos that I study, which are primarily recorded with a stationary camera in which only the “foreground” changes. The second problem with sampling one “salient” frames, is that we loose information about the temporal unfolding of the video file. From an analysis point of view, it is actually quite useful to know more or less when things happened in the video. That is not so easy if the sampling is uneven.
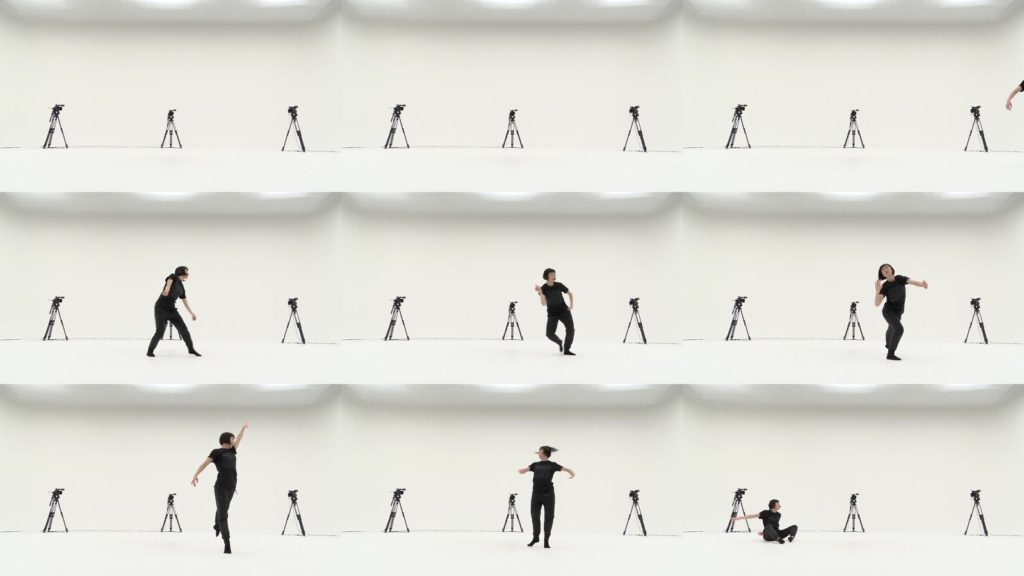
I was therefore happy to find a nice script made by Martin Sikora, which is based on looking up the duration of the file and use this to calculate the frames to export from the file. Running this script on the original video gives this image:

The 9 frames in the display above reveal that there is little dance in the first one third of the video file (can see the arm of the dancer enter in the third image). It also shows how the dancer moved around in the space. It is possible to get some idea about her spatial distribution, but there is little information about her actual motion throughout the sequence. I was therefore curious to try out making such a grid-based display from a history video, which actually shows some more of the actual motion.
It is possible to make (motion) history videos in both the Matlab and Python versions of the Musical Gestures Toolbox, but today I was curious as to whether it could be done simply with FFmpeg. And it turns out to be quite simple using a filter called tmix:
ffmpeg -i dance.mp4 -filter:v tmix=frames=30:weights="10 1 1" dance_tmix30.mp4
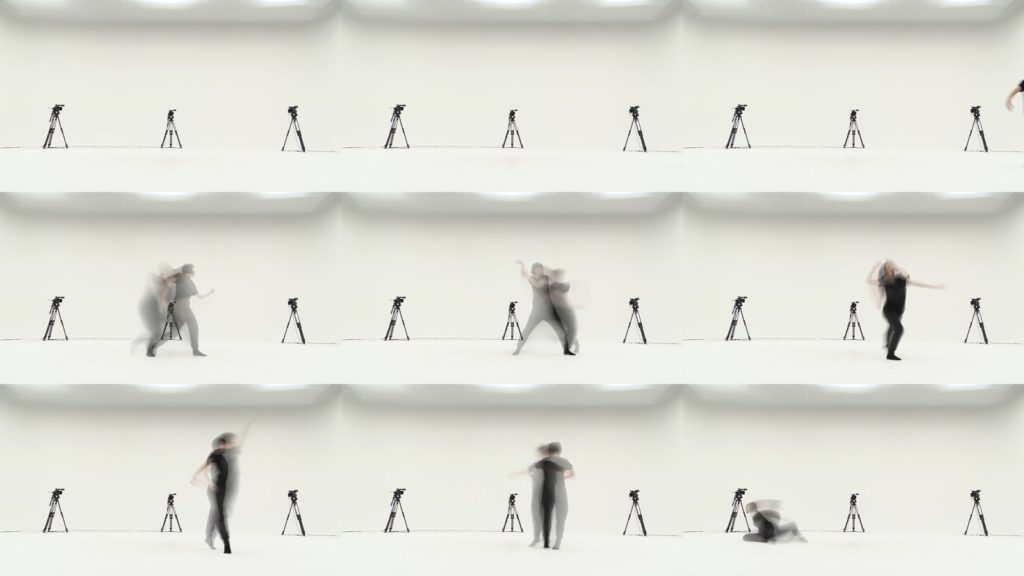
I played around for a while with the settings before ending up with these ones. Here I average over 30 frames (which is half a second for this 60fps video). I also use weight feature to give preference to the current frame. This makes it easier to follow the dancer, as the trajectories of past motion become more blurred.
Running the above grid-script on this video results in a keyframe display that shows more of the motion happening in the frames in question. This is useful to see, for example, when she moved more than in other frames.

I am quite happy with the above-mentioned, but it is not particularly fast. Creating the history video is time-consuming, since it has to process all the frames in the entire video. I therefore tested speeding up the video 8 times, using this command (the -an flag is used to remove the audio):
ffmpeg -i dance.mp4 -filter:v "setpts=0.125*PTS" -an output8x.mp4
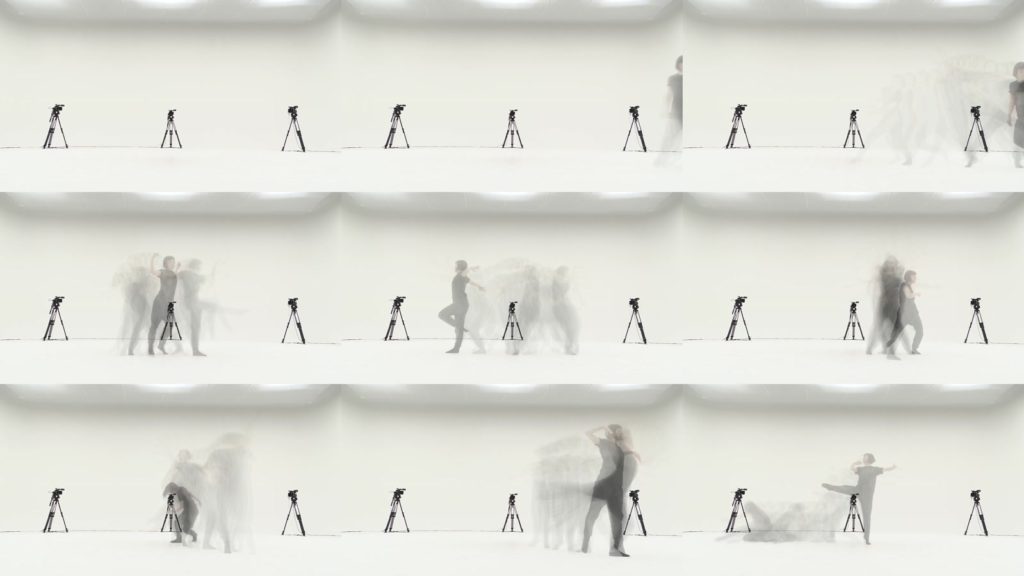
Running the history video function on this then runs quite a bit faster, and results in this hi-speed history video:
Running this through the grid-script gives a keyframe display that is both similar and different to the one above:

It is quite a lot quicker to generate, and also gives more information about the motion sequence.
The conclusion is that it is, indeed, possible to make a lot of interesting video visualizations using “only” FFmpeg. Several of these scripts are also much faster than the scripts I have previously used in Matlab and Python. So I will definitely continue to explore FFmpeg, and look at how it can be integrated with the other toolboxes.
